Paul and Diane Honig and their family moved into their new Passive House a couple weeks ago and are marveling at the indoor comfort as winter approaches. This is what it’s all about for us, creating a home that looks great, works well, and feels good to be in. The measure of what this means has changed dramatically as we have learned to apply Passive House principles to what we can design and build. Here is how that process evolves and what we’ve learned doing it.
DESIGN
Design begins with intention. The intention to create a home that uses very little energy, while not new, has taken on greater significance as awareness about the impact of energy use and the uncertainty about our energy future have been brought into relief by climate change, the finite limits of fossil fuels, and the increasing expense of the energy we rely on to live comfortably. Passive House provided us with the tools and understanding to respond to this intention. But a home like this is more than an efficient machine. It is also decidedly more comfortable, healthy, and durable. The Honig’s intention to create a home like this, and our ability to design and build it are what began this project.
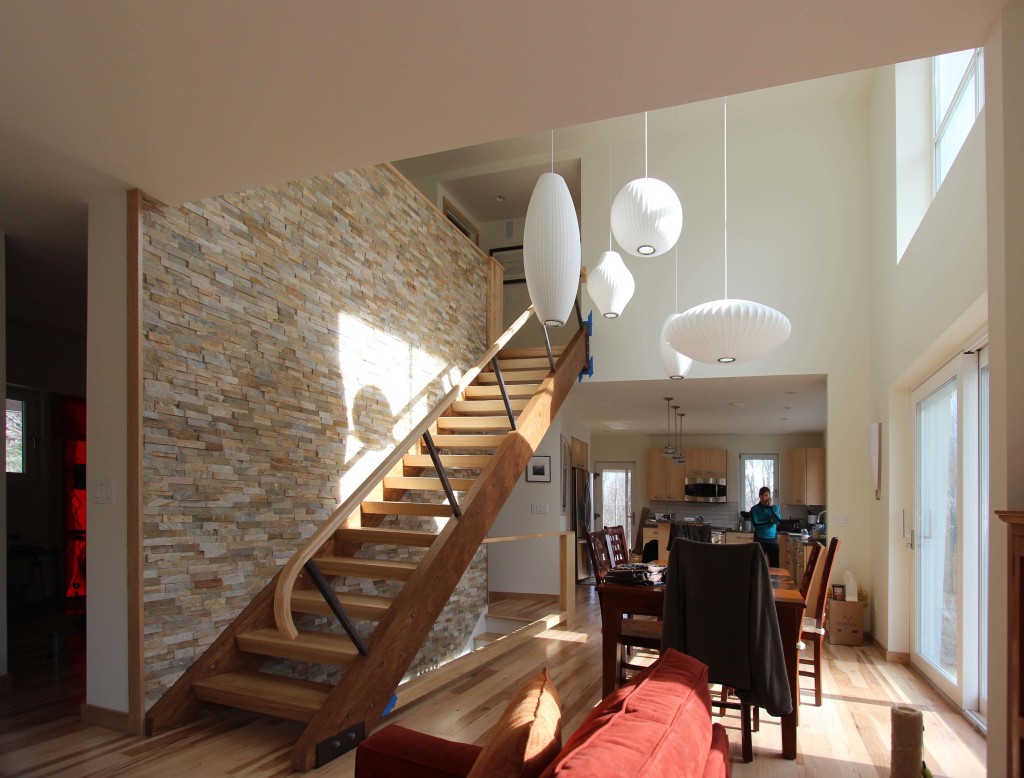
A home is of course designed to meet the practical needs of its owners, and to do that in a way that is visually delightful while providing a nurturing and convivial setting for those who live there and are invited to visit. This house is no exception. To perform well, the house also needs to be responsive to the site and its solar orientation. Fortunately the desirable views and connections between indoors and out were easily oriented to the south. That was a big plus and an important consideration in the choice of this site.
We began designing by understanding what the Honig’s needs were and arrived at a floor plan that would fit in the compact and efficient form that a Passive House favors, orienting living spaces to the desirable southern light and views. This means that the kitchen, dining, and living rooms are stretched across the 42′ long south side of the house, as are two of the three bedrooms. The entry, bathrooms, a study, and large mudroom stretch across the north. The sloping site also allowed us to get a large south facing window in the finished basement rec room. So far so good. We have a PLAN with a desirable form and orientation.
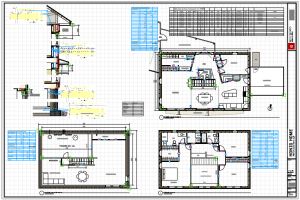 Passive House design requires diligent attention to the components that make up the walls. roof, and areas in contact with the ground. The basement slab is isolated from the ground and any contact with the foundation walls by EPS foam insulation(6″). We insulate inside our concrete foundation, then construct a wood frame double stud wall 12″ thick with dense pack cellulose insulation in the wall frames and EPS(4″) and Polyiso(1″) between them. When we use foam we only use foam with low global warming potential (GWP). The roof is framed with trusses and is insulated with two feet of loose fill cellulose. This thermal performance equates to an R83 roof, R46 walls, R32 foundation, and R28 slab.
We are also diligent about two other components of the buildings enclosure: thermal bridging and air leakage. Thermal bridges are elements of the building structure that undesirably conduct heat from inside to out. One way we mange this is by using as little wood in our frame as possible. The building was designed to align with a minimal framing plan. Window frames are the other thermal bridge we keep an eye on, add up all the window perimeters and you’ve got a lot of length. We were careful to detail insulation that covers this frame from the outside.
Since air leakage is one of the things we measure to assure certification we design details that assure the building will be as air tight as possible. We make sure there is a strategy to create an uninterrupted air barrier that completely surrounds the building. This begins with a membrane beneath the slab that is taped to foil faced foam insulation on the foundation walls, a rubber seal beneath the sill plate that sits on the foundation wall and exterior sheathing that is taped at its joints and around each window frame. This is finally taped to a plywood sheathed ceiling whose joints are also taped. We test this during construction to assure we are tight and remediate if necessary. We minimize penetrations into the building by using recirculating range exhaust and condensing dryers (no exhaust). When we do penetrate the enclosure with wires or pipes we use special gaskets to keep them air tight.
With windows our goal is net gain glazing, in other words windows that gain more heat than they lose on an annual basis. This means sizing and locating them carefully, accurately calculating the ways in which they are shaded and taking measure of the thermal values of their frames, glass, and even the spacers between the three panes of glass they use. We select glazing that allows as much solar radiation as possible on the south, and surprisingly, the north sides (reflected radiation) while rejecting that radiation on the east and west sides to prevent overheating. We end up with large expanses of glass on the south (recall those views!) and smaller and fewer windows on the other facades. We ended up with a ratio of 4:3 gains vs. losses.

We use the Passive House Planning Package (PHPP) to enter values related to all these components of the building to determine that the building will be able to operate at the low level of energy use that defines a Passive House. Without this series of 27 Excel worksheets we would not be able to predict how our building would actually perform. PHPP is our most essential design tool. As we make choices and enter the data that needs to be measured we check to see if we are achieving our energy balance. Every choice we make has the potential to tip things out of balance and when we do, we consider what might need to change to recover.
Once we are confident about our building enclosure we select mechanical systems to ventilate, heat, and cool the space. The same process is followed. Only the most efficient equipment, carefully sized and located, will allow us to achieve the energy balance. We chose Zehnder heat recovery ventilation for its exceptional efficiency and Mitsubishi mini-split ducted heat pumps to provide the small amount of heating and cooling that PHPP determined would be necessary.
Domestic hot water is one of the hardest energy loads to satisfy. Paul Honig decided to take on the construction of a system he had researched on the website builditsolar.com. You can see the work in progress on the Honig’s blog Our Connecticut Passive House. We also chose to use a drain water heat recovery system, a drain pipe that recovers the heat from water going down the drain as you shower.
Since a goal for this project was to achieve net zero energy use a photovoltaic array was installed on the south facing roof. The system was designed by Aegis Energy to provide energy for the house AND an electric vehicle that Paul is planning for. LED lighting and efficient appliances assure that as little energy as possible is required to satisfy those needs. The project is taking part in the CT Net Zero Energy Challenge where you can see more details.
On this project we were aiming not just for efficiency but costs effectiveness. We chose Intus windows from Lithuania for their great performance and value. The modern design of the house interior means the window openings just have drywall surrounding them – so no additional trim. We added detail selectively and created interest by skewing the front porch and garage 15 degrees off the axis of the house which creates architectural interest. We also used a few different materials and colors for the exterior cladding to help overcome the otherwise plain appearance of what is essentially a rectangular box. A screen porch extends off the east side of the house.
All this planning is essential to our ability to be sure the home will meet the Passive House standard. We work with the Passive House Academy to review our plans and provide quality assurance before we begin construction. Performance is essentially baked into the plan at this point, assuming we successfully construct what we have planned.
Part Two of this post will be focused on the Construction phase of this project.